Showing posts with label xp. Show all posts

Convert text to speech in XP without any software


Ever wonder you can convert text into speech in XP without using any 3rd party software .. !!

Try this little trick now ..

+ Open a new notepad file and copy the following code :

Dim msg, sapi
msg=InputBox("Enter your text","Talk it")
Set sapi=CreateObject("sapi.spvoice")
sapi.Speak msg
'+-> genuinetechmarks.blogspot.com <-+

+ Now save this file with any name with .vbs extension.

+ This creates a VBscript file. When you open this file, it prompts for text. Enter your text and click OK .Now you can hear it .. Enjoy .. !!

Want to share something ... !! Share it in the comments ..

Add your own photos to "My Computer" properties

Whenever you open "My Computer" properties, you will see a default Windows logo with some information about the configuration of the system. To this properties, you can add your own image and your own information to it.


Now lets come to the main part - adding your own image and information to the My Computer properties.

+ Open a new notepad file and copy the following code in it.

[General]

Manufacturer="Your company name"
Model=Intel® Core™2 Duo

[Support Information]

Line1= address
Line2= your ph number
Line3= Your email or website


+ In the above code, information under General will be displayed when you open 'My Computer' properties and the information under Support Information will be displayed when you click Support Information button.

+ Under this Support Information you can have add any number of lines, Line1 Line2 Line3 Line4 Line5 ... with some information.

+ Now save the notepad file as oeminfo.ini and copy it in the system32 folder.

+ Then open your favourite image and save it as oemlogo.bmp and copy this bmp file in the system32 folder.

+ See the My Computer properties now. You can see your own image and information present in it.

Friends .. Share your experiences in the comments .

XP hacks - Click here to see all the XP hacks

Hide system clock from toolbar in XP

System clock can be hide easily in the toolbar.This is a simple trick to hide the system clock in the notification area(known as system tray) in the toolbar.


Follow the steps ..

+ Open run -> regedit

+ Navigate to the path :

HKEY_LOCAL_MACHINE\Software\Microsoft\Windows\CurrentVersion \Policies

+ Here under policies, if Explorer key is created default, then click on it.If it is not present by default, click policies and in the right box, right click -> new key and give the name Explorer for it.Now click on the Explorer.

+ Now in the right box,right click -> new DWORD value and give it the name HideClock.

+ Right click on Hideclock and click modify.Enter the value as 1 and click OK.

+ Restart the sytem and it is DONE ... !!

Share your experiences in the comments ..

XP hacks - Click here to see all the XP hacks

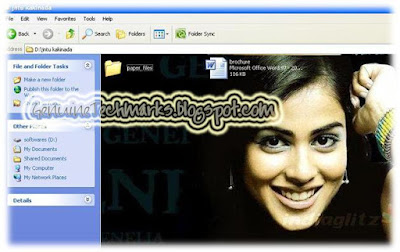
Set background picture for any folder in XP without any software


Previously I had written
a post about how to


In the above article we can change the background picture only for drives but not the folders.

But, this can be done with a simple notepad trick.

+ Open notepad and copy the following code in it.

[ExtShellFolderViews]
{BE098140-A513-11D0-A3A4-00C04FD706EC}={BE098140-A513-11D0-A3A4-00C04FD706EC}
[{BE098140-A513-11D0-A3A4-00C04FD706EC}]
IconArea_Image=F:\Celebs\hasini.jpg
iconarea_text= 0x00FFFFFF


+ Here IconArea_Image represents the path of your picture and iconarea_text represents the color of the text.

+ In the iconarea_text the last 6 letters ( 0x00FFFFFF ) represents the color code.

You can get all the color codes here ->
+ Now save the notepad file in the folder where you need the background picture and the notepad should be saved as DESKTOP.INI


+ Now change the icon of that folder by right click on it and click properties.Then go to customize tab and click change icon.Here change the icon of your wish.

+ Click ok and close.

Now you can see the selected picture as background in the folder.

Want to express something .. !! Share here in the comments ..

XP hacks - Click here to see all the XP hacks

Change the thumbnail size of photos in XP without any software

Wanna change the thumbnail view size of your photos in XP .. !! This can be done by a simple registry trick without any software.


Follow the steps here to change the size :

+ Open run -> regedit

+ In registry navigate to :

HKEY_CURRENT_USER\ Software\ Microsoft \ Windows\ CurrentVersion\ Explorer


+ In the right side box, right click -> new -> DWORD Value

+ Give it the name ThumbnailSize

+ Right click on ThumbnailSize and click modify.

+ Now change the value data to any number between 20 to 100 (in hexadecimal) or between 32 to 256 (in decimal).

Done .. !! Your thumbnail size will change as your desired size.

Normal thumbnail view size :


When value is changed to 32(in decimal) :


When value is changed to 144(in decimal) :


When value is changed to 256(in decimal) :

Like it .. !! Share your experiences in the comments .. ENJOY .. !!

XP hacks - Click here to see all the XP hacks

Set recycle bin to delete files in it automatically

The Recycle Bin is the special folders of windows on the hard disk to store deleted files and folders. These files or folders can be restored from the Recycle Bin to their original location if required for use.

But you can set the Recycle Bin setting that the files and folders are deleted from hard disk are not placed in the Recycle Bin. So with the help of windows registry editor you can set the Recycle Bin to always delete items.

Jus follow the steps :

+ First click on Start button then type Regedit in Run option.

+ Navigate to the following path :

HKEY_LOCAL_MACHINE\SOFTWARE\Microsoft\Windows\CurrentVersion\ Explorer\BitBucket

+ Here in right side panel, double click on NukeOnDelete and set its value 1.

+ Now close the registry editor and restart your computer after any changes to go into effect.

Enjoy !! Share your experiences in the comments.

XP hacks - Click here to see all the hacks

Auto delete temporary folder in windows

Generally in our systems,many temporary files are created which are useless and occupies much space in the hard disk.Many of us do not delete the temporary files which causes the system to slow up and eats up the space in hard disk.

Actually we can delete the temporary files manually by typing %temp% in run and delete all the files in the folder.But these temporary files can be deleted automatically whenever it is created in xp.

Follow the steps :

+Go to run and type gpedit.msc

+Navigate through :

Computer Configuration/Administrative Templates/WindowsComponents/Terminal Services/Temporary Folder

+Then right click "Do Not Delete Temp Folder Upon Exit" and go to properties and hit disable.

Now from next time when Windows puts a temp file in that folder it will be automatically deleted when it is created.

Share your experiences here in the comments after performing this cool trick.

XP hacks - Click here to see all the XP hacks

Change the icon of removable disk..

The removable disk has a default look.This default look of the removable drives can be changed by a simple trick.Follow the steps to change the icon ..


+ Select your favourite picture which u want to set for the icon of removable disk.

+ Save the selected image as anyname.ico (How to do is open the picture in mspaint. and save as anyname.ico).Make sure that selected image is small.
(OR) You can download any icon and name it.


+ Open note pad and copy the following code.

[autorun]
Label=DILLU
Icon=genelia.ico

+ Here label indicates the name of ur removable disk and icon indiactes the name of your icon.

+ Now save is notepad file as autorun.inf.

+ Copy both files (autorun.inf and Icon file) to your removable drive. You can make both files as hidden.

Now unplug the drive and connect it back to USB and now you can see the icon of your removable disk.Thats it!!

NOTE : The name of the icon you created and the name in the 3rd line of code must be same.

You can also set the background picture for your removable disk.This trick is explained in my previous article "Set background picture for any drive in windows".

Share your experiences in the comments ...

XP hacks - Click here to see all the xp hacks

Open or close cd/dvd drive with a single click in xp

The CD/DVD drive in windows can be ejected or closed with a single click in Windows XP by performing a simple trick.

To open the cd/dvd drive.. follow the steps :

+ Open notepad and copy the following code in it :

Set oWMP = createObject("WMPlayer.OCX.7" )
Set colCDROMs = oWMP.cdromCollection
if colCDROMs.Count >= 1 then
For i = 0 to colCDROMs.Count - 1
colCDROMs.Item(i).Eject
Next ' cdrom
End If

+ Now save this file as anyname.vbs

+ When you click it, the disk drive will be opened.


To close the cd/dvd drive .. follow the steps :

Set oWMP = createObject("WMPlayer.OCX.7" )
Set colCDROMs = oWMP.cdromCollection
if colCDROMs.Count >= 1 then
For i = 0 to colCDROMs.Count - 1
colCDROMs.Item(i).Eject
Next ' cdrom
End If

+ Now save this file as anyname.vbs

+ When you click it,the disk drive will be closed.

Share your experiences in comments after performing this cool hack.

XP hacks - Click here to see all the XP hacks

Set background picture for any drive in windows without any software


Generally, many of us use third party softwares to set background picture for any drive.But this can be done with a simple code without using any software in windows.


Perform the following steps ..

+ Open notepad and copy the following code :

[{BE098140-A513-11D0-A3A4-00C04FD706EC}]
iconarea_image=D:\Wallpapers\celeb\Genelia.jpg
iconarea_text=0x00FFFFFF


+ Here, the path in the 2nd line of code represents the path of your picture.The 3rd line indicates teh color ofthe text in the selected location.Complete list of html code colors can be obtained here.

+ Now save this file as DESKTOP.INI in the location(any drive or any folder) where you desire to set the background picture.

+ After setting it in your favourite location,close the drive and open the location again.

DONE !! .. your picture has been set as background picture for your desired location.

NOTE : Make sure that the extension in the path should be .jpg only and file should be saved as DESKTOP.INI only.

(OR SIMPLY)

+ Open notepad and copy the following code :

[{BE098140-A513-11D0-A3A4-00C04FD706EC}]
iconarea_image=Genelia.jpg
iconarea_text=0x00FFFFFF

+ Here, the 2nd line in the code represents the name of your picture.

+ Now save this file as DESKTOP.INI in the location(any drive or any folder) where you desire to set the background picture.And copy the picture too in the same location.You are DONE !!

Frnds ... SHARE your experiences in comments after performing this cool trick.Enjoy !!

Recover a Corrupted Windows XP

Many of you have seen the Blue Screen Windows Error which appears whenever happens something unexpectedly.This is known as Blue Screen of Death.It generally comes after encountering a critical system error which can cause the system to shut down to prevent damage.

Bluescreen errors can be caused by poorly written device drivers, faulty memory, a corrupt registry, an incompatible Dynamic-link library (DLL), or the computer overheating.

Many of them think that a serious problem has encountered to system and reinstall the XP.But Windows can be recovered into its original state by performing a little trick ,Disk Checkup.

Windows XP Installation CD is required for this trick.

Whenever a Bluescreen Error is encountered,follow the steps :

+ Restart your computer

+ Boot from your Windows XP installation CD

+ Press R to open the Windows XP Recovery Console

+ Type CHKDSK /R and press enter (wait until the whole recover/repair process is completed)

+ Type BOOTCFG to fix any problems in your boot.ini file

+ Restart your computer again and press/hold the F8 key

+ Select "Last Known Good Configuration" and press enter

Thats it .. !! Now Windows works perfectly..

Share your experiences in the comments ..

Display your name in Windows task bar

It is cool XP trick for you that will let you show off your name branding in front of your non-geek friends.This trick will let you display a name of your choice in the Windows Taskbar just beside the digital time clock.


Follow the steps ..


+ Open Start Menu and then open Control Panel

+ Double click Regional and Language Options

+ Click Customize (besides English U.S drop down menu)

+ Go to Time tab and change AM/PM symbols to the name of your choice

Now you are DONE !!

Share your views in the comments ..

Hide data in notepad without using any software

It is a pretty unknown trick to create hidden text files using nothing but Notepad, you can use this simple trick to hide plain text data without using any third-party utility.The text files created using the method below won't show anywhere in DOS or Windows irrespective of the hidden and system display file-settings, the files created using this can only be accessed if you know the correct file-name used while creating the file.

Just follow these steps to hide the data :

+ Launch Windows command prompt from Start Menu -> Run -> Type cmd and press Enter.

+ Using DOS commands navigate to the desired folder.

+Now, type notepad VisibleFile.txt:HiddenFile.txt and hit Enter, you can change
VisibleFile.txt and HiddenFile.txt to names of your choice (notice the : between both file-names), You will be prompted to Create a New file click Yes.

+ Now enter data you want to hide, save the file and close notepad.

+ Visit the file-save location, you will see your VisibleFile.txt file (non-hidden) there, you can open the file and enter any text of your choice as any other normal text file.

+ The hidden file HiddenFile.txt will not be visible under Windows Explorer or DOS.

+To open and read/write your hidden file, type in the command notepad VisibleFile.txt:HiddenFile.txt (change filenames with your own used during Step 3 above) at DOS command prompt and hit Enter.


Note : If the visible file (VisibleFile.txt) is deleted your hidden file (HiddenFile.txt) will also get deleted.

You are done .. !! Express your experiences in the comments ..


Notepad tricks - Click here to see all the notepad tricks

Remove "Folder Options" from Tools menu in XP

Want to remove Folder Options menu in XP .. !! It can be done with a simple gpedit hack and it involves modifying the Windows Group Policy editor (gpedit.msc).

Just perform the following steps to hide it ..

+ Navigate to Start -> Run. Type gpedit.msc and press Enter.

+ In the resulting window, navigate to the folder

User Configuration >> Administrative Templates >> Windows Components >> Windows Explorer

+ Look for the key named "Removes the Folder Options menu from the Tools Menu". Double-click the key and select Enable.Click OK.

+ To display the "Folder Options" menu, follow the previous steps and select the Not Configured option for the "Removes the Folder Options menu from the Tools Menu" key.

Share your experiences in the comments after performing this cool trick ..

XP hacks - Click here to see all the XP hacks

Disable 'Send/Dont send error report' in windows

Got annoyed by the Send/Dont send report window on windows when any application doesnt functioned properly..!!! Check out the following steps to disable the Send/Dont send report window.

+ Right-click the My Computer icon and choose Properties.

+ In the System Properties window that appears, go to the Advanced tab and click Error Reporting.

+ There you can Disable error reporting. This will make any crashing program's window simply close itself.

+ You could also click But Notify Me When Critical Errors Occur, but it might be even safer (and less confusing down the road) if you select Enable Error Reporting and Choose Programs to exclude only your commonly crashing program.

XP Hacks - Click here to see all the XP hacks

Change XP key after installing XP

Wanna change the XP key after installing XP !! ... Its very simple ... Jus follow the steps ...
Turn up your XP into Genuine with this cool trick ..


Image and video hosting by TinyPic
NOTE : Microsoft recommends that you run System Restore to create a new restore point before you follow these steps.

1. Click Start, and then click Run.

2. In the Open box, type regedit, and then click OK.

3. In the left pane, locate and then click the following registry key:

HKEY_LOCAL_MACHINE\Software\Microsoft\WindowsNT\Current Version\WPAEvents

4. In the right pane, right-click OOBETimer, and then click Modify.

5. Change at least one digit of this value to deactivate Windows.

6. Click Start, and then click Run.

7. In the Open box, type the following command, and then click OK.

%systemroot%\system32\oobe\msoobe.exe /a

8. Click Yes, I want to telephone a customer service representative to activate Windows, and then click Next.

9. Click Change Product key.

10. Type the new product key in the New key boxes, and then click Update.If you are returned to the previous window, click Remind me later, and then restart the computer.

11. Repeat steps 6 and 7 to verify that Windows is activated. You receive the following message:
Windows is already activated. Click OK to exit.

12. Click OK.

Friends .. Share your experiences in the comments ..

XP Tricks - Click here to see all the XP hacks